It's been a year and a half since my last blog post, but on Christmas Day, my sister told me I should post about the stuff I've been making. Since, she is my older sister, I pretty much am obligated to follow her directive, plus I'm pretty sure she is my only reader. :) So, this post is dedicated to all the creative MAKERS in my family. See below the result of our 2014 Family Market Christmas exchange (We wait until mid January, so everyone can attend, and travel to be together). Everyone brought their homemade goodies to share. I made bags to carry the swag.


This year, I went on a quilting rampage, making baby quilts for every pregnant teacher at the schoolhouse, totaling 7, plus one for my granddaughter, one for my dog Ruby, and one for a niece inspired by fireworks. I discovered the genius of master teacher Jenny Doan, the inspiration behind
Missouri Star Quilt Company, which led to online master classes at
Craftsy, and introduced me the brilliantly talented modern quilter,
Jaquie Gering, who calls herself a MAKER! So it's been a year of inspiration, learning new skills, and so much making that I didn't have time to blog about making. So there it is, my sister. Oh, and along the way I made lotions and soaps, and fell in love with a new Blendtec Blender.... So lots of blogging fodder in the future, if I have the time.
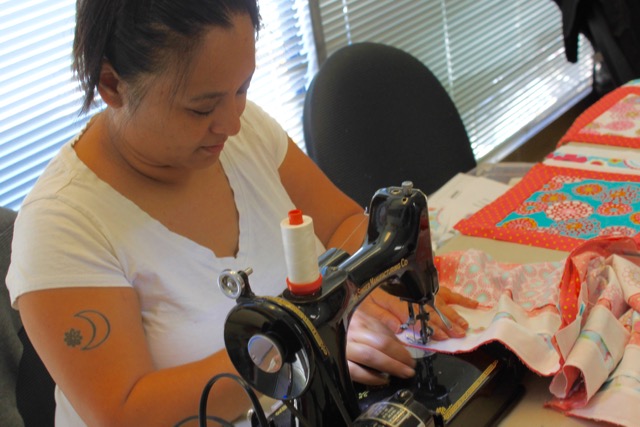
My return to blogging 2015 is an ode to MAKERS and a tutorial on how to make a Farmer's Market Bag. The Farmer's Market was the brain child of my niece, Carrie, or as her husband refers to it as the Family Bizarre. So early on I said I would make market bags. Then I discovered Jaquie Gering, and needed to practice modern quilting, so the projects emerged. I'm in the process of finishing fourteen bags, so here is a
tutorial instructions (I took pictures of the process, but now can't find them!)
1. Purchase bolt of heavy canvas
2. Cut 21" (make one cut with scissors and tear with two hands, then remove the strings) so that you have a 21" x 54" piece of canvas.
3. Cut off 9" off folded piece so that you now have a 21" x 42" piece of canvas. Set aside the extra pieces to use later.
4. Cut two (2) 4" wide strips.
5. Fold under the top part of bags a half inch and top stitch.
6. Sew the strap together.
7. Optional: quilt the center piece and attach a label
8. Open up main section of the bag and draw 2 chalk lines on the right side of the fabric 7 inches in from the sides.
9. Sew the strap onto the bag by centering your handle across the bag on the chalk lines and pin. Sew the handle down on the bag continuing out on handle area on both sides of the handle piece.
10. Sew pocket to the inside of one side.
11. Fold your bag in half right sides together. Sew a seaam down each side and then sigsag seam. Or you can sew wrong sides together, then turn and sew a second seam - "French Seam".
12. Make a 4" box bottom on both corners.
Some of the bags for Family Market, inspired by fabrics and individual's interests.
My grandkids call me "Honey" - slice and insert technique with diagonal matchstick quilting.
Beyonce, the giant metal chicken painted with oils by my husband, and free form quilted.
Giraffe slice and insert with parallel line quilting on the pocket front.
Western roping and riding slice and insert piecing, with diagonal parallel line quilting on the pocket front.
Super Nova Gering inspired flip technique, with radiating lines and pebble quilting.
I love PINK Crazy piecing and parallel lines quilting.
My garden is amazing - canning and vegetable crazy piecing, with matchstick quilting.
I Love the Islands - tropical flower slice and insert piecing with parallel line quilting.
Family Market explodes in Great-Grandma's (GG) living room.

Homemade Laundry Detergent, Hibiscus Kombucha, Aromatic Bitters, Vodka (shhh)
Apricot, three berry, grape jellies (my husband!), "F-Balm" chapstick, shell ornament, monogrammed tea towel, sugar scrub, bird's nest wire necklace (my son Ryan!) "Happy Camper" Doterra spray and lip balm.
More preserves, Sourdough bread (my son Kevin!) and starter mix so we can all do more baking.
Friendship Soup!
Can't wait to see what the family makes this year! May your year be filled with creativity and making. My New Year's resolution - blog once a month, and keep on MAKING!
I will share this post with Susan at
Between Naps on the Porch for Metamorphosis Monday!
wonderful Before and After for this Met Monday!
- See more at: http://betweennapsontheporch.net/preparing-the-yard-for-landscaping/#sthash.s3yHuXZo.dpuf