I've learned much from cyber-world, and so here's my contribution: Resolution Tote Bag
Step 1: Purchase blank canvas tote. I use Online Discount Clothing: The Deal Rack website to purchase a variety of weights and styles. This bagis BAGedge 12 oz with contrasting handles BE010, on sale for $3.31 each. I've also embroidered on the 10 oz bag (great value), and the heavy 16 0z boat tote (similar to Land's End big bag).

Made of 100 percent cotton canvas, the natural body comes in contrasting nylon webbing handles in 7 great colors. The bag measures 11.25"W x 14.5"H x 3"D.
Manufacturer Product ID: BAGedge BE010
Step 2: Create Design
My go-to favorite site is Urban Threads
Their contemporary designs inspire, motivate, and obsess me! Purchasing their designs is quick and easy (too easy). My machine only stitches 4" x 4" designs in PES format, so I am limited to the smallest designs. Cost: $3.00.
This design called Resolutions is perfect for a New Year's bag, reminding me to do the following:
Step 3: Choose threads. I line them up in front of the machine so I can see them together, and they are ready to go when I need them. Designs will Download design into design software. I use Essentials Embrilliance.
This inexpensive (compared to others) software, $139, allows you to use your Mac or Windows PC to merge embroidery designs, resize, colorize, add lettering, group/ungroup, and save in your machine's format. It took a while to figure out, but was worth the time spent. More on this program in future tutorial.
Step 4: Save on flash drive and upload to machine and transfer to machine. BTW, I'm using a Brother Innovis 950 D Embroidery and Sewing Machine (entry level machine). I will upgrade to a machine with larger hoops as soon as possible! Perhaps another resolution!
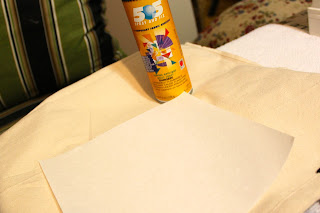
I use 505 adhesive spray to attach a tear away stabilizer sheet that will also be hooped.
Hoop stabilizer and fabric as tightly as you can. Tighten with screw on end of the hoop.
Step 6: Attach hoop to machine. Lock in place. If you need to change bobbins while embroidering, no problem. You unhoop from machine, but the embroidery unit stays in place so after changing the bobbin, you can easily rehoop the garmet to the unit and you're still in the exact same place!
Step 7: Choose design.
Cut threads as you sew/embroider because the threads are harder to cut later after they have been stitched over while completing the design.
Step 9: Tear Away Stabalizer (or cut away).
Step 10: Trim threads from front and back.
And that's it. This project took apx. 1.5 hours to complete. It follows one of the resolutions, "Be Creative Every Day."
Some of the other bags I made for gifts this year:
I'm posting on Metamorphosis Monday! Join me and check out all the innovative DIY's!
Happy Monday to all.
~CJ


